


Garage Door Installation
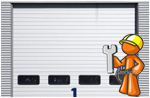
Garage doors are large, heavy, and mildly complicated, most people who buy them take advantage of these services.The garage door shown is equipped with a torsion spring system that is much safer to adjust than the typical standard torsion spring.
You should not attempt to adjust or remove a garage door that has a standard torsion spring mechanism--these are under extreme tension, which makes them dangerous.
The instructions that follow will guide you through the general principles of sectional garage door installation.
1. After attaching weatherstripping to the bottom edge of the first panel, set the panel in the doorway and fix it in place by driving nails partway into each jamb at an angle so that they wedge the door in place. Attach the hinges to the top edge of the door if they aren't already attached.
2. Following the manufacturer's instructions, assemble the various pieces for the vertical, curved, and horizontal tracks.
3. Install the rollers and any necessary brackets on the door section and any wall- or jamb-mounted brackets according to the manufacturer's directions. At one side of the doorway, slip the vertical track onto the rollers of the first door section. Repeat at the other side.
4. Install the rollers into the second section. With a helper, lift the section, set it in place, and slip its rollers into the vertical tracks at both sides of the doorway.
5. Fasten the hinges of the first section to the second one. For most types of doors, a power drill with a screwdriver tip or nut driver will make this work much faster and easier.
6. Install the third section, using the same procedures. Check the door for level and the vertical track for plumb. Fasten the top plates of both vertical tracks to the wall. Make sure the lag screws amply penetrate the framing members because the door will exert considerable force as it moves up and down.
7. Attach the jamb brackets to the tracks, and fasten them to the framing members. Again, make sure the lag screws go into sound framing. Don't tighten down the lag screws yet because you may need to adjust the tracks.
8. Install the curved and horizontal tracks, positioning the curved track as shown. Bolt the pieces together. If necessary, you can rest the horizontal track on top of a ladder.
9. Check the horizontal track for level, and then cut the rear track hanger to the length necessary for supporting the track. Screw the track hanger to solid framing (a ceiling joist or blocking), and loosely mount the track to the hanger. Repeat with the other horizontal track. Fit the last door section in place, and remove any temporary nails.
10. The type of door shown provides the necessary lift assistance with a "torque tube." If you intend to use an opener, wait to install the tube. Otherwise, install the torque tube according to the manufacturer's directions. Roll up the door about 4 feet to check for the alignment of the tracks, and make any adjustments. Then tighten all fasteners.
Questions? Call us to discuss any Questions ,Garage Doors or Gates problems you have.
Call us toll free at: (866) 492-2477
Never get an answering service or a recording. You'll always
talk with us live!
competitively priced services, offering skilled
work on all your needs regards Garage doors & Gates.